Zaloguj się PreviewPilot

Join the Gobo Revolution!

INDOOR PROJECTOR


1. IMPORTANT NOTES BEFORE USE


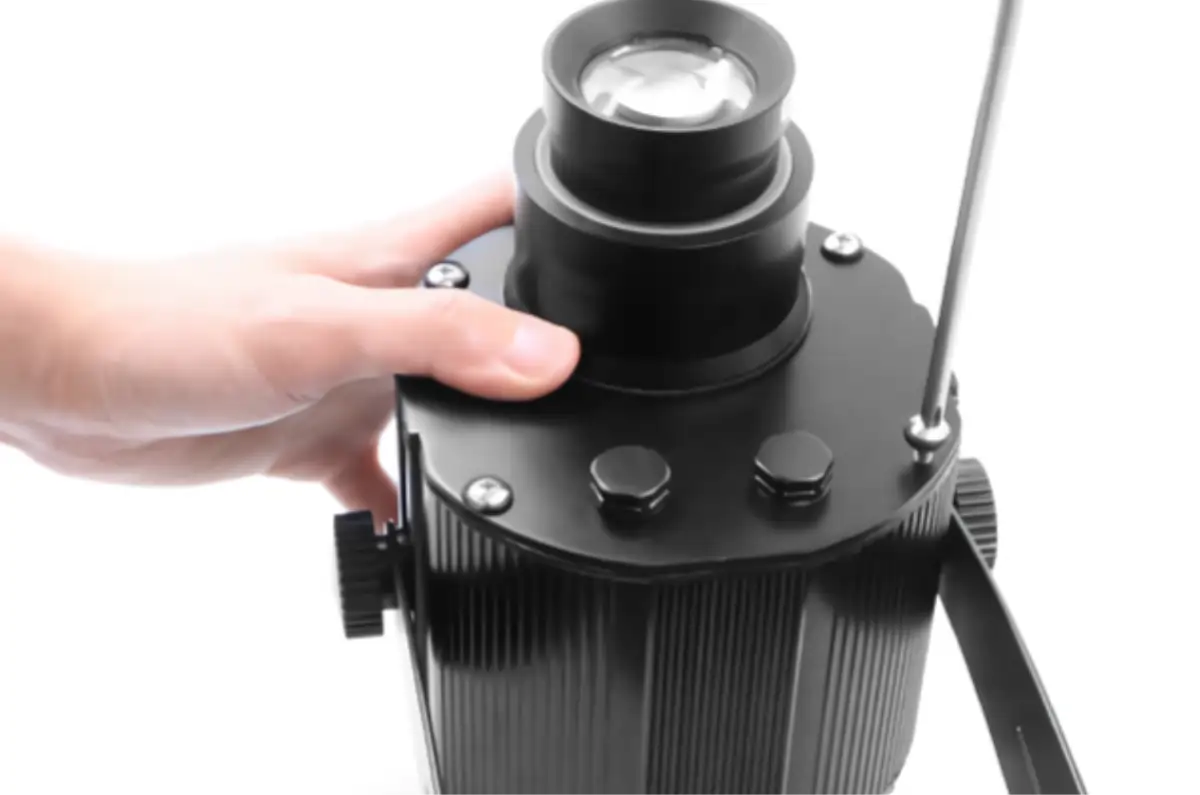
FOCUSING THE PROJECTION

To ensure a sharp and clear projection, follow these steps to adjust the focus:
  • The product uses a zoom imaging system. After receiving the projector, adjust the focus as needed.
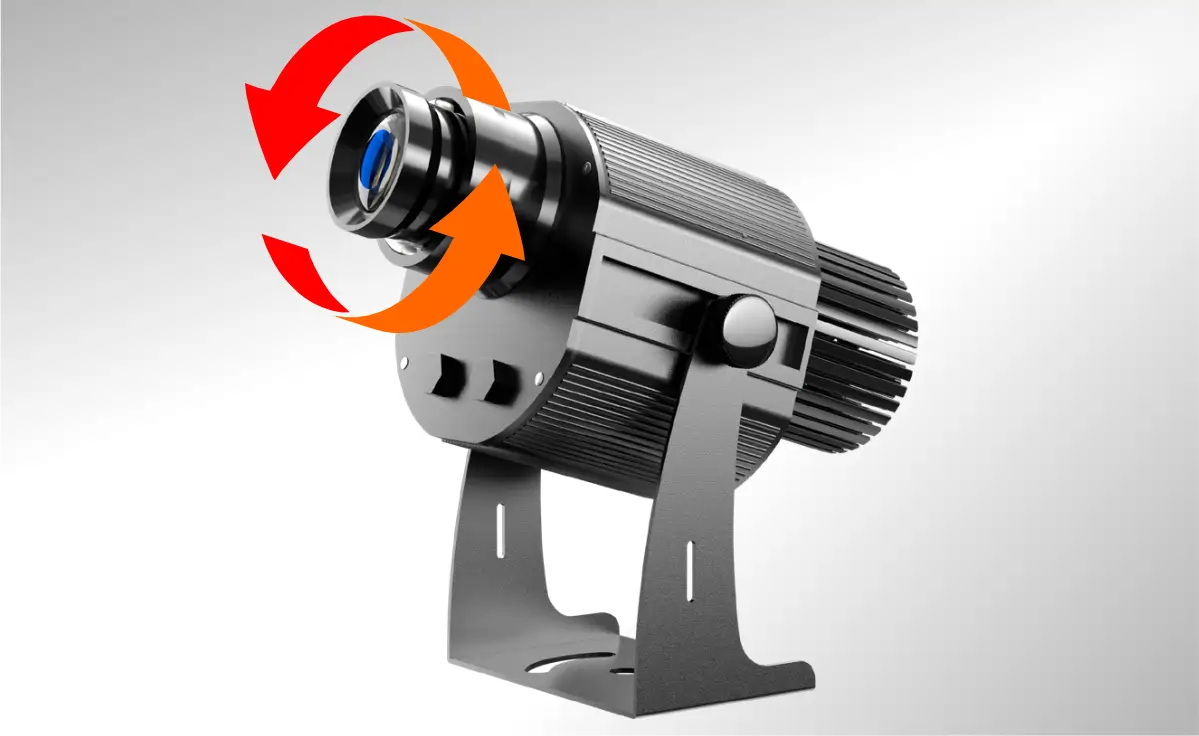
  • Turn the lens at the front of the projector (a label on the lens indicates adjustment).
  • Rotate the lens outward or inward until the logo projection is sharp.
important:
  • For shorter projection distances, rotate the lens further outward.
  • For longer projection distances, rotate the lens inward.
ADJUST SPIN/STATIC MODE

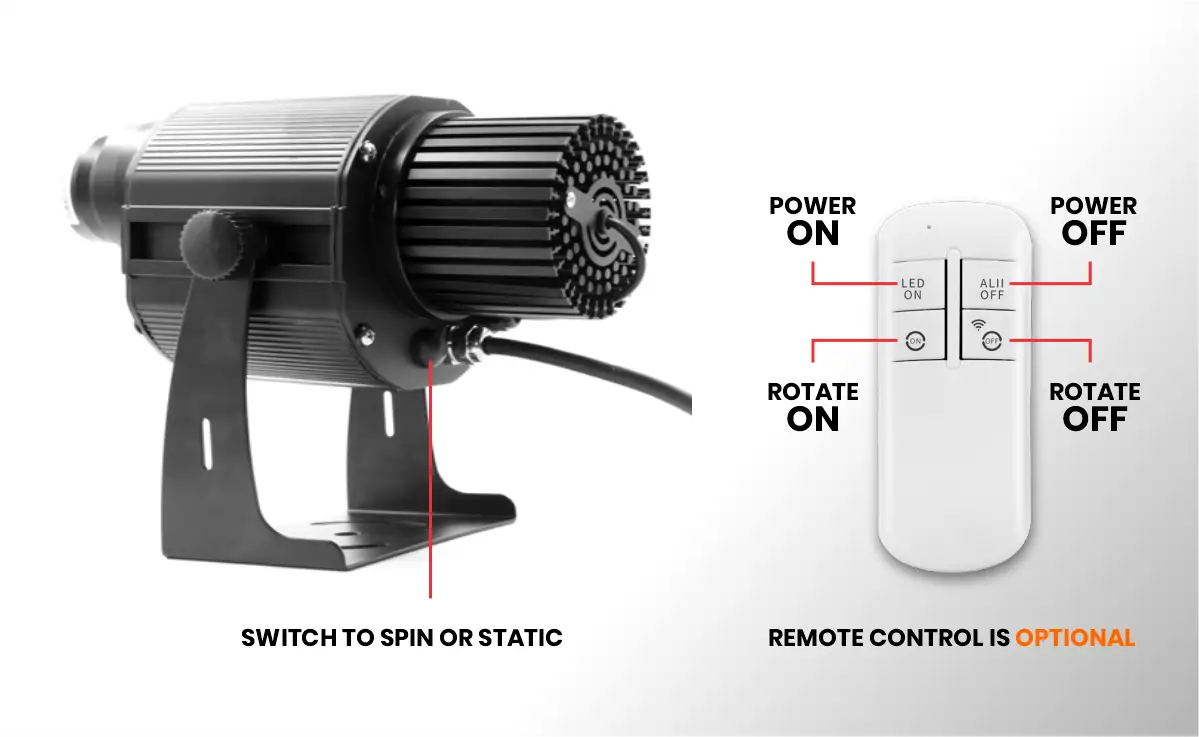
  • Change the switch position on the back of the projector stand according to the projector function required.
  • There is a switch at the rear of the lamp .Press the switch to spin or static.
  • Remote control function also available, it can control the logo to spin or static, and turn on and off the projector light.

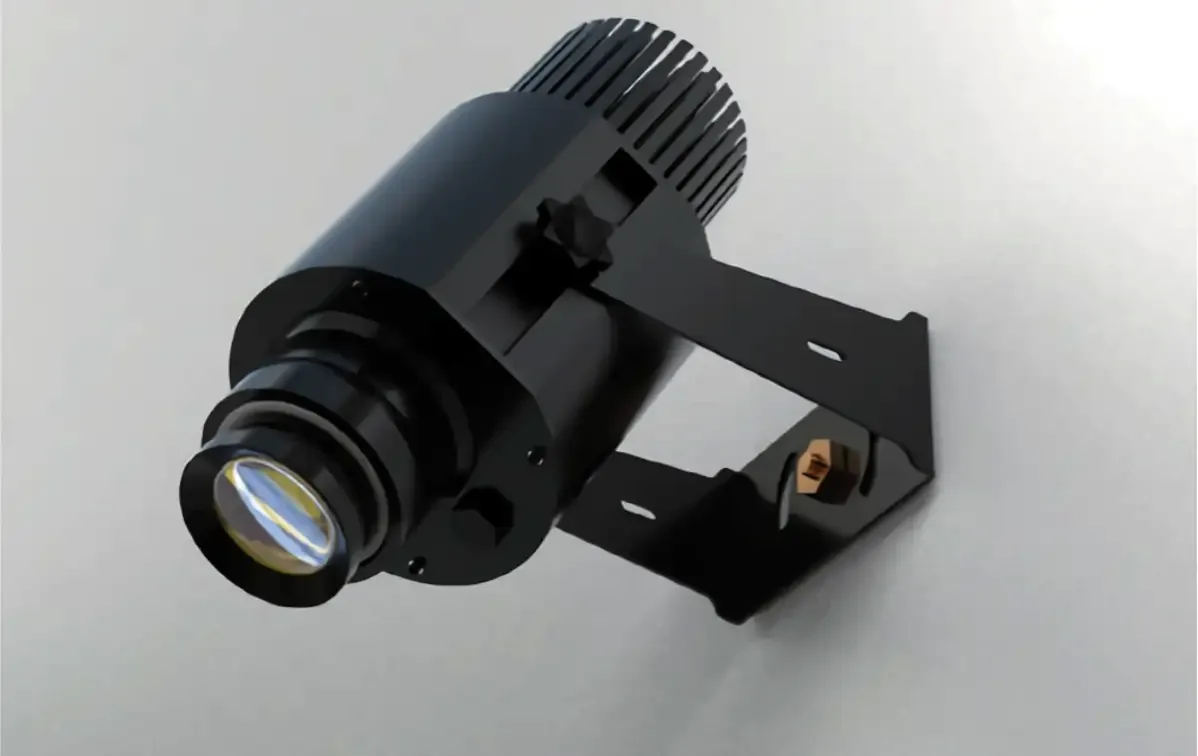
2. PROJECT INSTALLATION


PREPARATION

  • Drill screw holes in the positions to be installed
  • Put the explosion screw into the punched hole first
  • Align the screw hole of the machine base bracket into the threaded end of explosion screw.

INSTALLATION

  • Screw the nut into the thread at the end of the explosion screw until it is tightened
    ∞ installation is completed ∞

3. REPLACING GOBOS


STEP 1

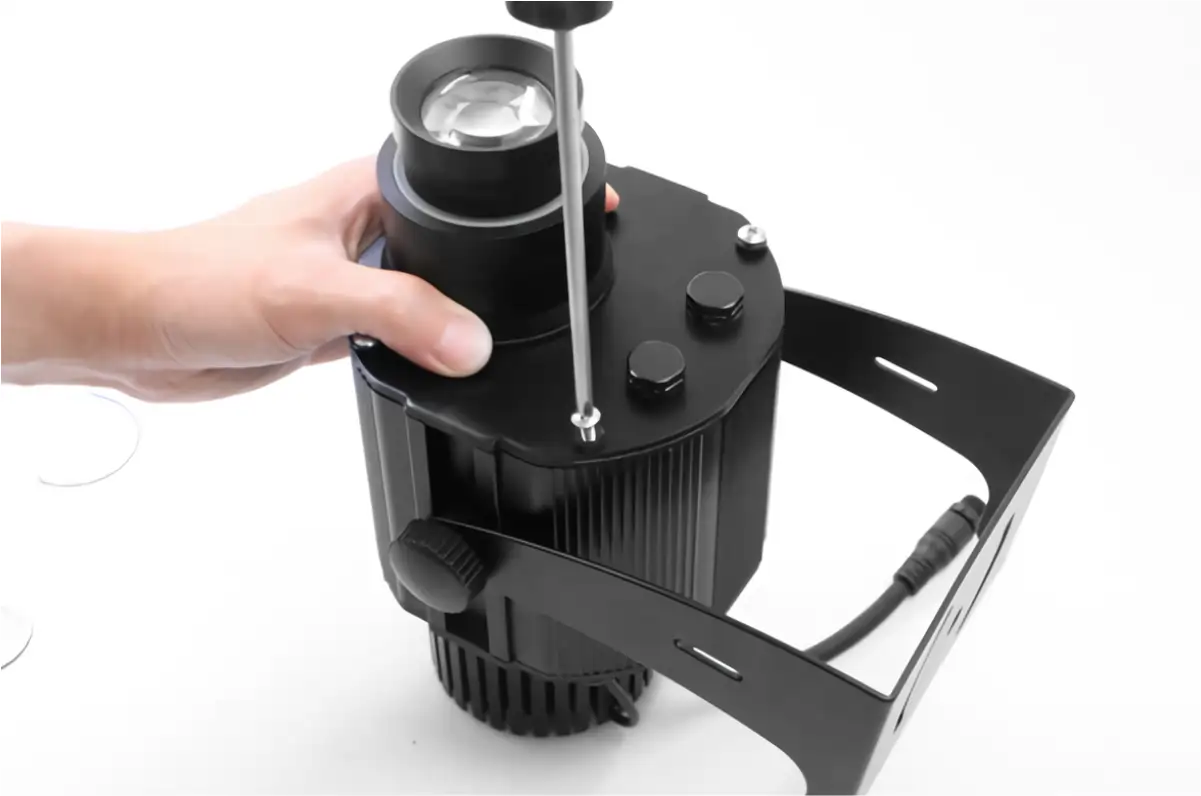
  • Unlock all the bolts on the front cover of the projector
  • slowly open the cover
  • then you will see the inside of the projector and the gobos that are installed.

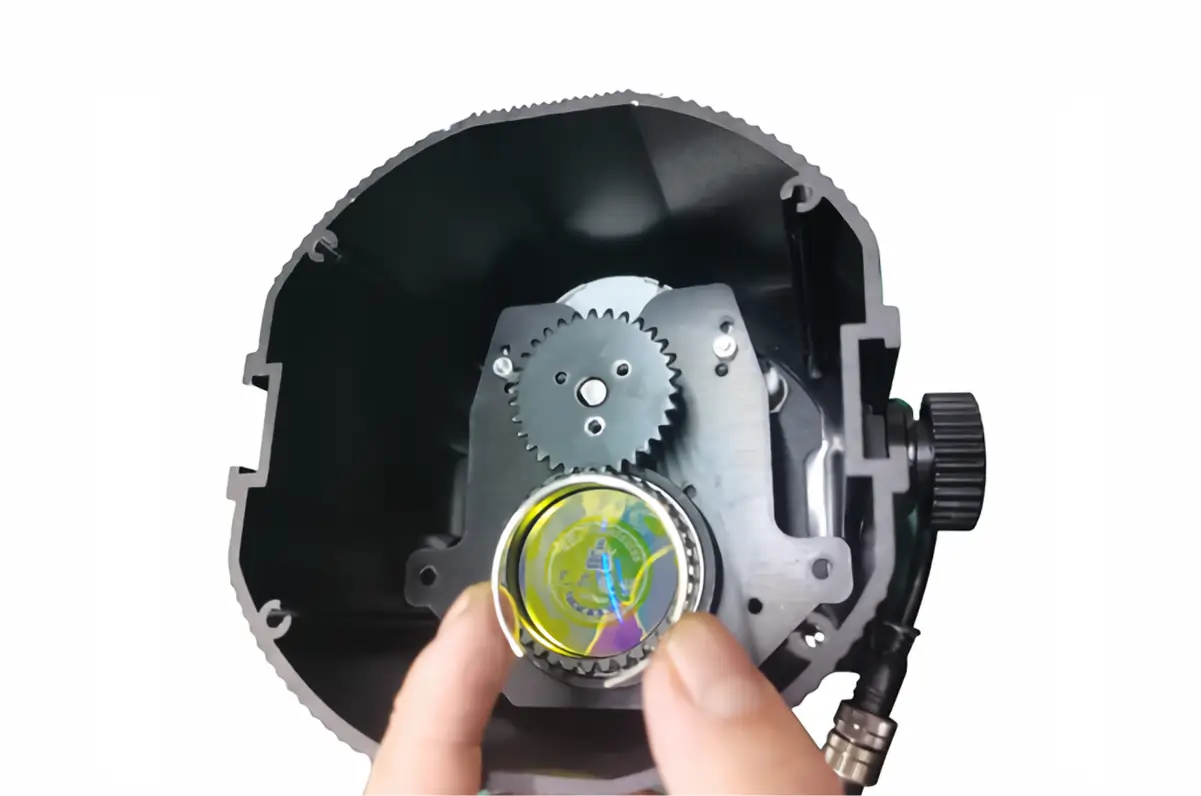
STEP 2

  • Take out the spring on the GOBO and then take out the GOBO
  • Note: A little soft glue will be applied to install the gobo that you received, and no glue is needed when replave or reinstall gobo. only the spring is needed to clamp the gobo.

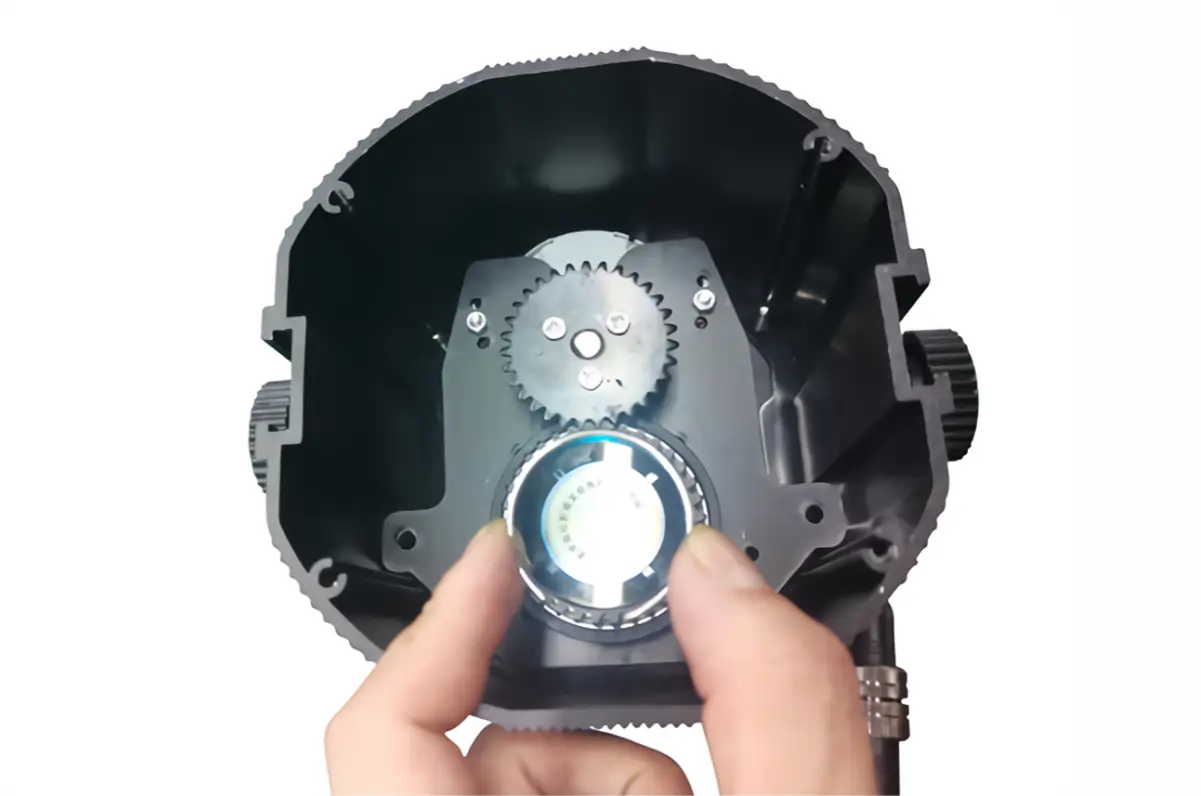
STEP 3

  • Take the gobo out and replace with new gobo
  • Make sure the new gobo are clean from dust and other particles
  • Insert the new gobo, Ensuring the "REVERSE SIDE" is facing up.
  • Secure it with the snap ring.

STEP 4

  • Reinstall the projector front cover and make sure the bolts are tightly installed.
  • REPLACEMENT COMPLETE!
    Enjoy Your New Projector


Back To Top Menu

OUTDOOR PROJECTOR


1. IMPORTANT NOTES BEFORE USE


FOCUSING THE PROJECTION

To ensure a sharp and clear projection, follow these steps to adjust the focus:
  • The product uses a zoom imaging system. After receiving the projector, adjust the focus as needed.
  • Turn the lens at the front of the projector (a label on the lens indicates adjustment).
  • Rotate the lens outward or inward until the logo projection is sharp.
important:
  • For shorter projection distances, rotate the lens further outward.
  • For longer projection distances, rotate the lens inward.
ADJUST SPIN/STATIC MODE

  • Change the switch position on the back of the projector stand according to the projector function required.
  • There is a switch at the rear of the lamp .Press the switch to spin or static.
  • Remote control function also available, it can control the logo to spin or static, and turn on and off the projector light.

2. PROJECT INSTALLATION


PREPARATION

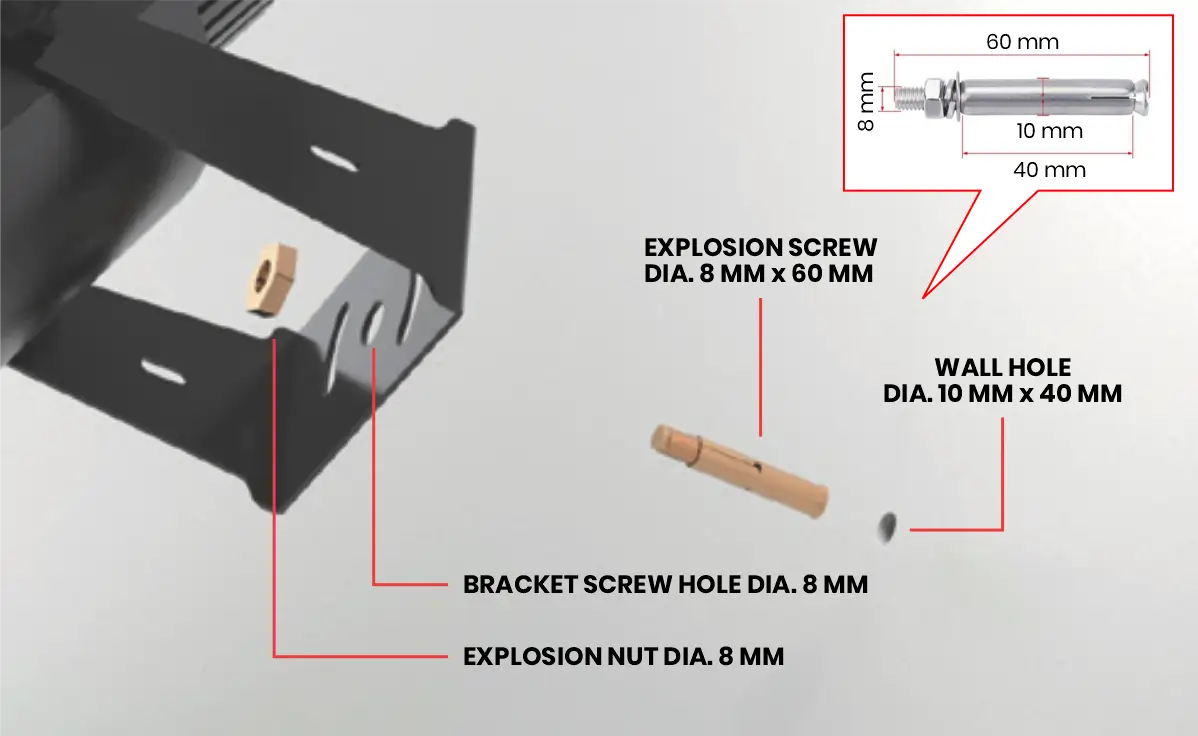
  • Drill screw holes in the positions to be installed
  • Put the explosion screw into the punched hole first
  • Align the screw hole of the machine base bracket into the threaded end of explosion screw.

INSTALLATION

  • Screw the nut into the thread at the end of the explosion screw until it is tightened
    ∞ installation is completed ∞

3. REPLACING GOBOS


STEP 1

  • Unlock all the bolts on the front cover of the projector
  • slowly open the cover
  • then you will see the inside of the projector and the gobos that are installed.

STEP 2

  • Take out the spring on the GOBO and then take out the GOBO
  • Note: A little soft glue will be applied to install the gobo that you received, and no glue is needed when replave or reinstall gobo. only the spring is needed to clamp the gobo.

STEP 3

  • Take the gobo out and replace with new gobo
  • Make sure the new gobo are clean from dust and other particles
  • Insert the new gobo, Ensuring the "REVERSE SIDE" is facing up.
  • Secure it with the snap ring.

STEP 4

  • Reinstall the projector front cover and make sure the bolts are tightly installed.
  • REPLACEMENT COMPLETE!
    Enjoy Your New Projector


Back To Top Menu


INFO SHEET

Checkout more information of Product Flyer / Info Sheet

View Product Flyer